Every morning I hit the start button on my Smart Grinder Pro and listen to the sweet whiny song of the beans for my morning brew churning through its burrs.
To keep it humming, I clean my coffee grinder regularly. Over time, coffee dust can accumulate in every nook and cranny of a grinder, gumming up its moving parts and straining the motor.
Oils coat the hopper, burrs, and grind chamber, and slowly go rancid, tainting the flavor of the fresh beans you grind for your morning brew.
Here’s how to deep clean your Breville Smart Grinder Pro to get rid of all that bitter gunk, keep your coffee tasting fresh, and your grinder running well.

What You’ll Need
- A brush (the Smart Grinder Pro comes supplied with a soft brush, but I find that a firm toothbrush works better)
- A vacuum cleaner with a hose attachment
- Tip: clean off your vacuum nozzle with a disinfectant wipe before you stick it in your grinder
- A lint-free cloth
Step 1: Clear Out the Beans

If you have a hopper full of beans, set them aside while you clean your grinder.
The Smart Grinder Pro has a dial inside the hopper to unlock it from the body of the grinder. This seals the bottom of the hopper so that you can lift it off the grinder without dumping beans all over the counter.

Empty the beans from the hopper into a clean container and set them aside.
Return the hopper onto the grinder and lock it back into place, then press the start button to run the grinder and clear out the beans remaining in the grind channel.

Once the grinder is fully empty, shut it off and unplug the machine from the outlet.
Remove the empty hopper and wipe it out with a lint-free cloth. If it’s especially grimy, wash it in warm soapy water and rinse and dry it thoroughly.
Step 2: Take the Top Burr Out

You unplugged the grinder, right? Good. You don’t want your fingers anywhere near those burrs with the machine plugged in. I have a gory story related to that, but I don’t want to make anyone queasy.
Remove the upper burr by lifting the metal handle and turning it counterclockwise. It might be a little stubborn if it’s been a while and coffee dust has compounded around the burr’s casing.
Step 3: Scrub It Out

With the top burr removed, turn on your vacuum cleaner and suck up the loose grinds and dust from the bottom burrs.
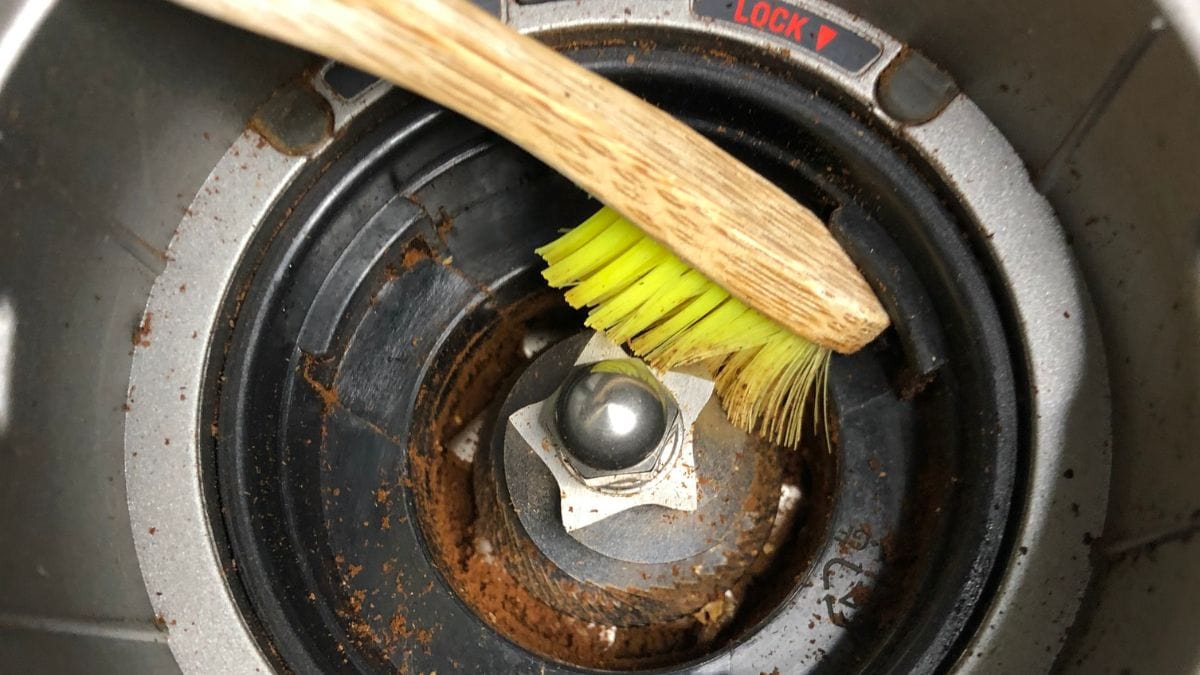
Then, use your brush to scrub out the burrs, working into the gaps and crevices to loosen up the debris, while you hold the vacuum hose over the top to clean as you go.

While you have the top burr removed, work your brush up into the grind chute to clear out the grinding chamber from below. Grounds clogged in there will dislodge and dump out onto the tray. Vacuum them up.
Step 4: Reassemble

All that’s left now is putting your grinder back together.

Return the upper burr into position and lock it into place by turning it clockwise.
Replace the hopper on the grinder and lock it on. Wipe and polish the exterior of the grinder with a soft damp cloth and you’re good to go!
Frequently Asked Questions
How Often Should I Clean My Grinder?
I recommend doing a full clean every month or so, to scrub out the burrs. About once a week, I empty the hopper and wipe it out, along with the grinding chamber.
The daily maintenance is just a matter of brushing out excess grounds from the grind outlet and the tray.
Assuming you’re not grinding coffee at the volume of a cafe, this schedule should keep your grinder from accumulating too much coffee plaque.
Can I Use Rice To Clean My Grinder?
Don’t use rice to clean your grinder!
The idea behind using rice is that it absorbs oils and grinds. But dry rice grains are much harder than coffee beans and can damage your grinder.
Some people use parboiled, quick-cooking rice since it’s softer than regular rice grains. Even so, aside from potentially damaging the machine, running any rice through your grinder may void the warranty. So I definitely would not recommend running rice through any burr grinder.
Should I Use Grinder Cleaning Tablets?
Using grinder cleaning tablets is an easy way to clean out your grinder without disassembling it.
Simply run them through the empty grinder and they absorb oils from the burrs and casings.
After running the cleaning tablets through, grind some sacrificial coffee beans to clean out any tablet residue. That’s it! Then your grinder is clean and ready to go.
Two of the most popular brands of grinder cleaning tablets are Urnex Grindz and Full Circle. I’ve used both products as a barista, and they both work well.
Although my personal preference is not to run anything but coffee through my grinder at home, many people do use cleaning tablets with their grinders. They’re effective, safe, and remarkably easy to use.
How Do I Remove the Bottom Burr on My Smart Grinder Pro?
I find that I can generally get the grinder good and clean using the method above, without having to dismantle the bottom burr.
But if coffee debris is caked in there, you may want to remove the bottom burr from your Smart Grinder Pro to scrub out beneath it. To do so, you’ll need a 10mm socket wrench and some needle-nose pliers.
After you’ve taken off the top burr, use the wrench to remove the domed nut that holds the bottom burr in place. With the nut removed, the bottom burr can be lifted off. Just be careful not to lose the washer and split washer beneath the bolt!
On the shaft beneath the bottom burr, there’s a metal piece with teeth. This is called the impeller. Lift the impeller out with the pliers, being gentle as there’s a fragile felt washer beneath it.
Once this is disassembled, you can proceed to brush out the chamber before reassembling it.
Happy Caffeinating!


