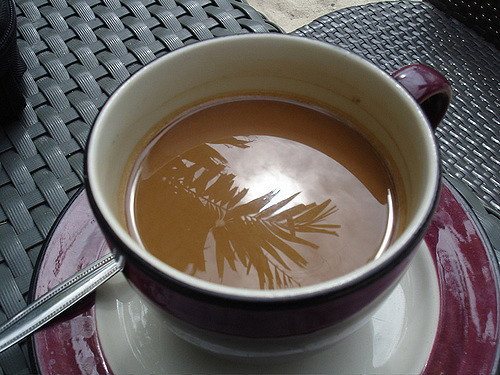
I love my morning coffee routine. Most days, I am perfectly happy brewing a simple cup with one of the many pour-over drippers taking up space on my kitchen counter like houseplants. But sometimes I really just want a thick, foamy latte.
You might think you need a massive, expensive espresso machine to make cafe drinks at home. I used to think the exact same thing back when my entire coffee setup consisted of a single Keurig. It turns out you can make fantastic steamed milk without a steam wand. You just need a way to heat the milk and a way to introduce tiny air bubbles into it.
Get a FREE first bag of coffee from our friends at Atlas Coffee Club when you subscribe. Enter your email to get the deal.
Frothing and heating milk at home can be done using three easy methods that do not require a commercial espresso setup. You may even have the equipment for at least one of the methods described here.
Quick Comparison: Milk Frothing Methods
Here are the three methods side by side. Pick one based on the time you want to spend on it and the tools you have.
| Method | Equipment Needed | Foam Quality | Time Required |
|---|---|---|---|
| French Press | French press, microwave or stove | Excellent (Thick and creamy) | 2 minutes |
| Handheld Frother | Battery-operated whisk, mug | Good (Light and airy) | 1 minute |
| Mason Jar | Glass jar with tight lid, microwave | Fair (Large bubbles) | 2 minutes |
Method 1: The French Press
The French press is my absolute favorite tool for making thick foam. I basically lived off coffee from a cheap French press during grad school. Little did I know it doubles as an amazing milk frother. The fine mesh screen forces air into the milk rapidly, creating a texture that rivals actual steam wands.

How to do it:
- **Heating Milk:** Milk can be heated on the stove or the microwave. Do not start it boiling. A temperature between 140 and 150 degrees Fahrenheit should suffice.
- Pour the milk into your clean French press. Remember not to fill it over halfway, as the milk will expand when steamed.
- Pump the plunger: Put the lid on top. With one hand, hold the lid down while pumping the plunger up and down vigorously with the other hand.
- Check the texture: You should wait for 15 to 20 seconds, and by then the milk should be thick and have a frothy texture. Before you pour it on the coffee, let it rest for a few seconds.
Method 2: The Handheld Frother
The handheld frother is a classic for a reason. These little battery-operated whisks cost next to nothing and fit right in your silverware drawer. They are incredibly convenient for a quick morning drink.
How to do it:
- Warm the milk in your mug. Leave enough space at the top to not spill over.
- Submerge the whisk: Position the frother whisk so that it is just below the surface of the milk.
- For froth: Turn on the frother and hold it just below the surface for a few seconds to pull in air and make bubbles.
- Establish a vortex by placing the whisk deeper into the mug and tilting it slightly. This will create a whirlpool effect that distributes the bubbles evenly throughout the milk. Be sure to turn the frother off before pulling it out of the milk—this will prevent a mess.
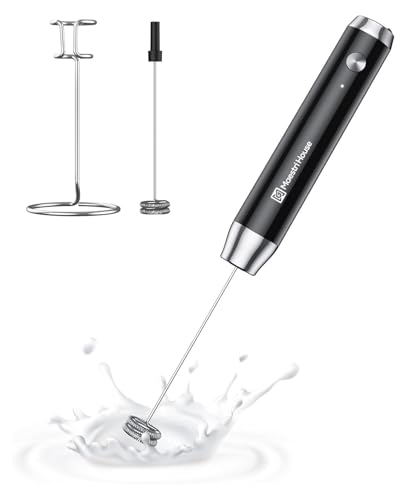
Maestri House Rechargeable Milk Frother with Stand
Check PriceMethod 3: The Mason Jar and Microwave
This is the ultimate low-gear approach. All you need is a glass jar with a tight lid, and a microwave. You don’t need any special coffee equipment.
How to do it:
- Fill the jar: Pour cold milk into your mason jar. Fill it no more than halfway.
- Screw the lid on tight. Shake the jar hard for 30 to 60 seconds. Make sure the milk doubles in size.
- Step one is very simple. Metal lids like this should be removed completely.
- Microwave the jar without a lid for 30 to 45 seconds. The heat will stabilize the foam so it doesn’t fall down when you pour it out.
A Quick Note on Milk Temperature
No matter which method you choose, pay attention to how hot your milk gets. You never want to boil it. Scalded milk tastes terrible and completely ruins the sweet, creamy flavor you want in a latte. If you do not have a thermometer, just heat the milk until it is hot to the touch but still comfortable to hold in a mug.
Which Milk Works Best?
Frothing is most simple with whole milk since the fat and protein are able to develop a quality stable foam that holds well with the coffee. Meanwhile, with skim milk, while it might seem lower in quality since it produces a lot more foam, the bubble structure is much coarser and drier in feel rather than creamy.
If you prefer dairy alternatives, oat milk is a fantastic choice. Just be aware that standard grocery store oat milk can be a bit watery. Look for cartons labeled as a “barista edition” or “barista blend.” These versions have added fats that help the milk froth up nicely.
Final Thoughts
Making coffee at home must be fun and within reach. You should not have to buy a commercial espresso machine or spend $90 on a kettle to get your morning latte. Give one of these tips a try tomorrow and see what you think. It might surprise you how much better your coffee can taste with a bit of momentum.