As a coffee lover, you know that brewing a delicious cup of coffee from home can be a challenge. And, with a Ninja Coffee Maker in your arsenal, it’s more than likely you’re after the best cup of coffee you can whip up. While these machines can undoubtedly treat you to a wide variety of different brews, there’s also a lot to learn!
However, using a new coffee machine is rarely intuitive. There will likely be some things that you’ll have to Google or some buttons whose functions you can’t even guess. But let me tell you that while the manuals contain an overwhelming amount of information and there are certainly many different modes to get your head around, using the Ninja Coffee Maker isn’t as tricky as it seems. And luckily, we’re here to provide the answers to all your burning questions.
So, here’s everything you need to know about how to use your Ninja Coffee Maker.
The most popular Ninja Coffee Machines
So, first things first, let’s get into the nitty-gritty of the different Ninja Coffee Machines on the market today.
Since they’ve been producing coffee machines since the 2000s, it’s fair to say that Ninja has a lot of experience creating a good coffee maker. They have countless different models and designs on the market with many different features. Plus, many of their old models are still circulating as refurbished products – Ninja is just that good!
These are the most popular machines on the market today:
Dualbrew Pro
The Dualbrew, Ninja’s latest and most innovative design, is the first Ninja Coffee Maker to combine K-Cup compatibility with regular drip-feed coffee. Throw in a warming plate that can keep your coffee warm for up to four hours, a durable glass carafe that can serve up to 12 people, and a foldable milk frother, and you really do have a machine that can do it all!
Hot and Cold Brewer
With the capability to brew everything from a single cup to a full carafe, the Hot and Cold brewer was Ninja’s most exciting machine – before the Dualbrew came along, that is! It has an included iced coffee function and can make a delicious cup of hot coffee. It can also brew a range of teas. Plus, while the carafe is slightly smaller than the Dualbrew with a 10-cup capacity as opposed to 12, it is thermal instead of glass, which, in our opinion, makes up for it.
Speciality Coffee Maker
The Specialty Coffee Maker is the most limited machine on this list, but don’t let that put you off. By coffee-machine standards, it’s not very limited at all! It’s very similar to the Hot and Cold brewer, except it doesn’t have the tea function – which isn’t the main feature you look for in a coffee maker anyway! It doesn’t brew pods either, but no other Ninja can compete with the Dualbrew on that count! The Speciality Coffee Machine can brew a range of delicious drinks, from a full, hot carafe, to a single iced latte. It also has a wide range of brew sizes and can produce hot and iced coffee.
How do I use the drip coffee feature of a Ninja Coffee Machine?
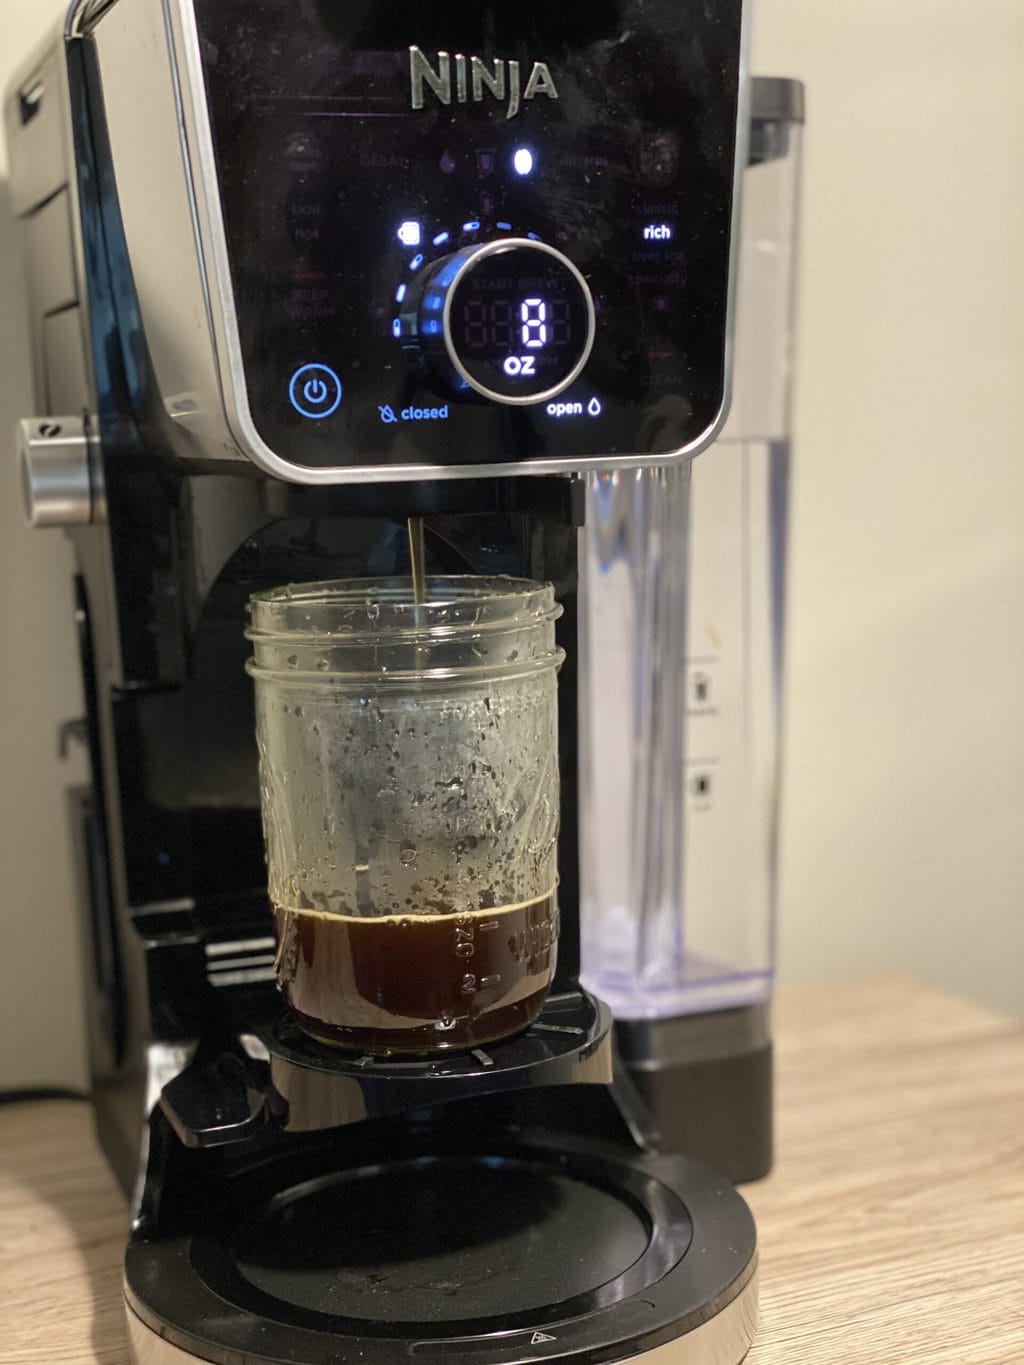
First of all, let’s dive in with the most basic brewer function – the drip coffee feature.
To use the drip feature of your Ninja Coffee Machine, you’ll first have to decide on your brew size. There’s a handy shelf that flips out for a single cup brew, so you don’t have to place the cup directly onto the hot plate. You can set your carafe on the hot plate to brew an entire pot.
Step one:
Put your cup or carafe onto your machine.
Step two:
Add your coffee. The brew basket easily pulls out, revealing the permanent filter. One of these machines’ best features is that you can add your coffee grounds to the basket without you having to slide your machine from under your kitchen cupboards. No lid lifting, no moving the machine – simply pull the coffee basket towards you to add your coffee.
Most Ninja machines come with a measured double coffee scoop to simplify this step. Each side of the measuring scoop tells you what the measurement is for – one side is for the full or half carafe, and the other is for a cup or travel mug.
Step three:
Add the correct amount of coffee grounds to your filter depending on what size brew you choose and push your brew basket back in.
Step four:
Use the controls to select whether you want a classic, rich, iced, or specialty brew, and select a brew size. Then, the Auto IQ technology in your machine (which we’ll cover later) will take care of the rest.
And voila – a delicious cup or pot of coffee! But, if you want to know a little more about those brew options, keep reading.
What’s the difference between the Ninja Coffee Maker classic and rich brew?
Making a rich brew is pretty similar to making a standard classic cup. You still use the scoop to select the same amount of grounds for the size brew you want, and you still place the grounds in the brew basket. You follow most of the steps we outlined above. The only difference in the process is that you select rich brew instead of the classic brew button.
Next, the water will pour into the brew basket. You should expect a slight resting period at this point while the coffee grounds infuse with the water. This is the part that’s slightly different from the classic brew as the waiting time will typically be longer. It allows Ninja’s thermal extraction technology to bring out the beans’ even more full-bodied flavor. The rich brew needs slightly more contact time between the water and the coffee grounds to make that richer cup of coffee.
The final difference between the classic and the rich brews is what happens when you add milk or cream. You’ll still get the full flavor of the coffee with the rich brew if you add either of these things to your cup. Coffee creamer, syrups, milk, or anything else you want to add won’t dilute or water down that flavor. It’s the same with any serving size, too, from a small cup to a full carafe, and it’s another reason why Ninja Coffee Machines are one of our favorites!
How do I make my Ninja coffee stronger?
Ninja Coffee Makers don’t use traditional methods to make a stronger tasting cup of coffee. Typically you might have a ‘strong’ or ‘bold’ button, or simply guess and experiment with more coffee grounds, hoping to get a stronger brew.
However, with Ninja, you use the same amount of grounds. The machine then uses thermal extraction technology to give you a fuller flavored cup. Depending on how strong you want your coffee, Ninja will rest the grounds for longer, allowing them to open up more and to give you a richer, stronger flavor.
How do I use the K-Cup functionality of the Dualbrew?
The Ninja K-Cup functionality is only available on the Dualbrew or Dualbrew Pro models. To use it, you’ll have to use the Ninja pod adapter, which replaces the regular brew basket on the top of the coffee machine.
First, you’ll need to place the K-Cup adapter inside the machine. To do this, slide the lid that says ‘slide for grounds’ all the way back, exposing the cone-shaped brew basket. Next, place the adapter inside the basket.
You should see wording on the top left of the adapter that says ‘remove’ and ‘lock.’ To lock the adapter in place, push it back until the arrow lines up with the word lock. You should now see the light on the front of the machine displaying the K-Cup symbol.
Once your machine is set to pods, you’ll be able to lift up the lid of the pod adapter. Inside, you’ll see the circular spot where the pod sits. There are three needles on top which pierce the K-Cup and another single needle at the bottom.
To brew a cup of coffee, put the K-Cup into the slot and close the lid. Select which coffee brew you want, whether it’s classic, rich, over ice, or specialty brew, and then select the size. The Ninja Dualbrew Pro gives you four different K-Cup sizes: 6, 8, 10, and 12 ounces. Once you’ve chosen your size, simply hit ‘start brew.’ It’s as simple as that!
Lastly, let’s go over switching the Ninja from pod coffee back to drip coffee. It’s almost exactly how you placed the adapter in the machine but in reverse. First, you’ll need to set the unit to ‘remove.’
Using the lever at the front, slide the entire brew basket back a notch. You should then be able to lift the K-Cup adapter back out of the machine and slide the lid back in place, leaving your brew basket ready to use. The light on the front should have switched back to the bean symbol.
What is the Speciality Brew feature on a Ninja Coffee Maker?
The Speciality Brew feature on a Ninja Machine is Ninja’s own version of an espresso shot. The first thing to point out is that it’s not actually espresso. A true shot of espresso is one thing that Ninja Coffee Machines haven’t yet learned to do.
Instead, Specialty Brew is a stronger-tasting super concentrated few ounces of coffee with a substantially higher punch of caffeine and flavor. It isn’t designed to be drunk by itself (hence why it’s not considered a substitute for espresso). However, it pairs delightfully with Ninja’s milk frother feature to create delicious milky drinks like lattes and cappuccinos.
How to use the Speciality Coffee feature
Using the specialty brew is a fairly simple process similar to the other brew styles we’ve mentioned. The only difference is that, with this setting, you’ll most likely be adding milk.
First, heat the milk in the microwave (this is another thing the Ninja can’t do for you), and use the frother to make it deliciously foamy (we’ll go into more detail on exactly how to do this soon). Pour the milk into your cup.
Next, take your cup of hot, frothy milk and place it on your coffee machine. Place the grounds for a cup into the brew basket, select a single cup, and choose a specialty brew. Once again, the Ninja will take care of everything for you.
It’s worth mentioning that there will be an even longer waiting time with the specialty brew option because you want that really rich, concentrated coffee flavor. The grounds have to infuse longer and need more water contact.
You still put the same amount of grounds into the basket as if you were brewing a single cup of classic brew. During that waiting period, Ninja’s thermal flavor extraction technology has dialed up the richness level even further. The result is a much more flavorful, intense shot of specialty brew.
How to set the delay brew on your Ninja Coffee Maker
The delay brew feature on a Ninja Coffee Machine is a handy little tool that lets you program your coffee maker to brew a cup or a carafe (or even a pot of tea) at a specific time. You can set it up to 24 hours in advance, so you can have the perfect cup of coffee ready when you get home from work or when you wake up in the morning.
To set the delay brew function, ensure that the water reservoir is full enough. Next, add the correct amount of coffee or tea to the brew basket and place the proper sized cup or carafe underneath. You can program any size vessel with the delay brew setting, whether you want a single cup, a carafe, or even a travel mug, for a coffee that’s ready to go to the office with you!
Next, hit the delay brew button, which will illuminate the button and start the clock flashing. Use the buttons next to the clock to select which time you want and then select the size of the brew and your brew style. Once you’ve set your choices, wait for the delay brew button to stop flashing or press it again to confirm your selection. Once activated, the delay brew setting will remain illuminated, and your coffee will be ready for you at the time you want. Pretty cool, right?
If you want to cancel, simply press the delay brew button again.
What is Auto iQ on a Ninja Coffee Maker?

Essentially, the Auto IQ feature on Ninja Coffee Machines allows you to choose a size and brew and then creates the perfect cup of coffee for you.
Once you’ve selected your size and brew, Auto iQ will pull the exact amount of water required for that specific brew from the removable water reservoir. It heats it to between 195 and 205 degrees – the perfect temperature to brew coffee.
Then, the water enters the brew basket where the grounds are. Based on the options you’ve selected, Auto IQ knows how to brew that specific type of coffee. It knows whether you need to wait to let the water infuse the grounds and for how long, depending on the cup size and amount of grounds you have. This is the reason for the longer delay when you’re brewing rich and specialty brews.
Saturating the grounds in water allows them to infuse with the full flavor of the coffee instead of simply trickling straight through like traditional coffee makers. The more grounds, or the richer the desired flavor, the longer it has to saturate.
Once Auto IQ senses that the grounds are opened up and infused with the water, it will restart the water flow in your machine and provide you with a beautiful, full-flavored cup. Other coffee machines simply pour one stream of water through the center of the grounds, oversaturating the coffee in the middle and undersaturating the coffee on the outside. This can cause a bitter or sour coffee taste. However, the Ninja Coffee Brewer Auto IQ technology ensures that all the grounds are evenly saturated and the full flavor can come out, which will provide you with a much tastier cup.
How do I use the Ninja milk frother?

Now, let’s talk about how to use the Ninja built-in, fold-away milk frother. It’s a straightforward process, but there are a few things you should know before you get started. First, Ninja Coffee Machines won’t actually heat the milk for you.
So, if you’re brewing a hot drink like a latte or a cappuccino, then you’ll need to heat the milk, either using a milk steamer or in the microwave before you get started. Of course, you can always froth cold milk for a cold drink if you want to.
The milk frother is located on the side of the machine. It simply flips out when you need to use it and folds back in again when you don’t. The best way to make a specialty drink is to heat the milk first (if you want it hot), and then brew your specialty coffee over the top of it.
Once you’ve heated your milk in the microwave, place the tip of the frother into the milk until it’s sitting just below the surface. Then, hit the push button on top of the frother arm to froth the milk. You’ll need to froth it for between 30 and 45 seconds.
Once you’re done frothing, I recommend removing and cleaning the wand immediately because otherwise, it will make a drippy mess all over your surface.
What are the standard features of Ninja Coffee Machines?
While we’ve covered a few features specific to individual models above, there are many bells and whistles that Ninja adds to all of their coffee machines. Here are a few examples:
Six brew types

Not only can you choose between coffee, iced beverages, and even tea with these coffee makers, Ninja also gives you a broad range of brews to suit every preference. These are:
- Classic Brew — If you’re searching for a fantastic but simple cup of classic coffee, this is what you want.
- Specialty Brew — This potent espresso-like brew is perfect for producing unique coffeehouse-style beverages that pair well with frothed milk.
- Rich Brew — This setting is perfect if you prefer a slightly bolder taste or like your coffee with a bit more of a kick. It also goes really well with milk without being overpowered.
- Over Ice Brew — This is the setting to use if you like your coffee iced. It gives it a much tastier, more refreshing flavor and doesn’t become watered down when the ice melts.
- Cold Brew — Another setting made specifically for cold coffee, this one steeps your grounds much longer to create a smooth and intense flavor that’s perfect on a hot day.
- Café Forte — You need this setting for a truly strong and powerful cup of coffee. It extracts the most flavor to brew a full-bodied drink that’s sure to transport you from your kitchen to an Italian cafe!
Custom serving sizes
If that isn’t enough variety for you, Ninja also allows you to choose between a range of different brew serving sizes. Unlike an average coffee maker, a Ninja machine has a single cup option. It’s similar to pod coffee makers, but the key difference is that this single-cup serving doesn’t need pods.
It’s ideal if you want a machine that can cater to a large family or host guests. But, it can also cope with much smaller amounts, for when you don’t need to feed a crowd.
The six different brew settings available on most machines are:
- Cup
- XL cup
- Travel mug
- XL multi-serve
- Half-carafe
- Full carafe
Some newer machines, such as the Dualbrew Pro, have even more options, including a small cup and a quarter carafe. But don’t worry, we’ll cover that soon!
Environmentally friendly brewing
If you care about the environment, this may be one of the most important and attractive characteristics of the Ninja Machines. It’s not something that you’d usually think about when buying a coffee machine, but it is definitely worth considering.
The brewing size flexibility mentioned above means that people who would otherwise need to buy a drip coffee maker and a separate pod maker for single-serve use no longer have to. You can now ditch the pods for a single serving of coffee and use Ninja’s just as good (if not better) pod-free option. This reduces the number of pods used, which is more environmentally friendly.
Of course, the Dualbrew coffee maker is pod compatible. However, the machine’s wide range of functionality means that, as well as using pods, you can make a single-serve brew in other ways. Once again, this is much more economical than using a dedicated pod machine.
On top of that, Ninja’s handy permanent filters also mean that you don’t need to buy disposable paper filters to make a delicious cup of coffee.
Keeping your drinks hot
This is an essential feature for those who would rather brew their coffee once and come back to it later. Ninja has solved this problem with their clever hot plate that keeps a full carafe of coffee hot for up to four hours. It’s also ideal for entertaining guests; simply brew a full carafe and leave it on the hot plate for people to help themselves.
A hot drink ready when you wake up
Next, let’s talk about the programmability of Ninja Coffee Machines. One of the best features of these models is that their coffee maker can be set to start brewing automatically at any time within 24 hours. You don’t have to worry about waking up early enough to make your drink before leaving for work. Ninja has got you covered!
Attractive design
Finally, let’s not forget about how good these machines look. Their sleek and attractive design will fit in well with any kitchen, no matter how modern or traditional it is. Plus, they’re not too bulky, so they don’t take up as much counter space. And, they save even more space when you consider that they’re basically two machines in one!
So, these are the main features that you need to know about when choosing a Ninja Coffee Maker. Now it’s time to talk about how they work!
Which filters can you use with a Ninja Coffee Maker?

The standard coffee filter included with most Ninja Coffee Makers is the permanent gold-tone filter. It’s a reusable filter that sits directly in the brew basket. It’s also super-environmentally friendly (no using paper every day) and easy to clean, too.
However, some people would prefer to use paper filters. Most Ninja models will fit a standard size 4 paper filter. To use it, first, you need to remove the permanent filter. Then, get your paper filter and fold the side and bottom seams over. When you place the filter in the brew basket, folding it helps it lay nice and flat, and it won’t fold in on itself once you start brewing. Then, just add your ground coffee, and start brewing!
What size brews can you make with a Ninja Coffee Machine?
The Ninja Coffee Machines have a range of different settings that you can use to make coffee. These are some of the sizes that you can create with these versatile machines:
- Small cup – 8 ounces
- Cup – 10 ounces
- XL cup – 12 ounces
- Travel mug – 15 ounces
- XL travel mug / multi-serve – 18 ounces
- Quarter carafe – 28 ounces
- Half-carafe – 37 ounces
- 3/4 carafe – 46 ounces
- Full carafe – 55 ounces
How to clean your Ninja Coffee Machine
Finally, let’s talk about how to clean your Ninja Coffee Maker. Depending on how often you use your machine, you’ll probably need to descale it once every few months. It’s a really simple process that just takes a little time. All you need is a descaling solution, soap, a sponge, and some water.
How to descale your coffee maker
The first sign that your machine needs descaling is a little blinking light. This is your machine begging you to clean it! Descaling a coffee maker should take around 15 minutes and only needs to be completed every few months or so.
For a step-by-step guide, check out how to descale your coffee machine here.
How to clean the inside of your machine
As well as descaling your coffee machine, you also need to give it a rinse inside now and then to prevent leftover coffee grounds and coffee residue from clogging it up.
All of the removable parts (the permanent filters, the water tank, the K-Cup adapter if you’re using a Dualbrew) can be taken off and rinsed. For an even more thorough cleaning, you can also use a mixture of warm water and white vinegar to really purge it.
I also recommend periodically doing a pure water rinse through your machine to remove all the leftover grounds.
Don’t forget to clean the outside
Of course, it’s even simpler to keep the outside of your machine clean. First, take off all of the removable parts. Then, wipe it down with a damp cloth, soap, and water to keep it looking good as new.
Overall…
Ninja Coffee Makers are fairly easy to use. Most models have intuitive buttons, levers, and switches to help you create delicious drinks and specialty brews. So, if you’re a Ninja Coffee Machine addict, we sincerely hope this article cleared up any confusion regarding these amazing coffee makers and helped you understand just how simple your favorite home appliance is to use.
Happy Caffeinating!


