K-cups are a great alternative to ground coffee. The numbers also show that Americans are getting on the K-cup trend. According to Statista, up to 40% of Americans have single-serve machines as their go-to for hot coffee.
Typically, you would need a Keurig K machine to enjoy the delicious coffee a K-cup offers. But, while they may be popular, Keurig K machines can develop faults.
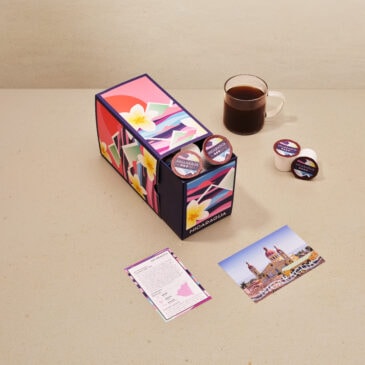
"The best coffee pod I've ever tasted"
Yes, we mean that. Finally, specialty coffee for your KCup machine, roasted fresh to your order by our friends at Atlas Coffee in Austin, TX! Get 50% OFF to try it with code ROASTYPODS
Get a FREE first bag of coffee from our friends at Atlas Coffee Club when you subscribe. Enter your email to get the deal.
Or maybe you have a craving for a cup of joe, and there’s no Keurig machine at hand.
The good news is that it’s possible to open K-cups and use them with a standard coffee maker. You’ll get your favorite brew without losing any of the unique taste that you love.
All you need is a coffee filter, your trusty coffee maker, and a little bit of patience.
How Do K-cups Work? Using K-cups with a Keurig Machine
Before we delve into the inner workings of using K-cups with a regular coffee machine, you need an understanding of how they work. The average K-cup pod has a foil lid covering a cup.
Manufacturers use polystyrene to make the cup. Polystyrene is the material of choice because it’s food-safe and can resist moisture, heat, and light. That’s why the contents of a K-cup are always fresh.
Inside a K-cup coffee pod is ground coffee, a paper filter, and food-safe adhesive. When you hit the right button on your Keurig machine, it heats water from the reservoir before pumping it into the K-cup chamber.
Two needles in the K-cup chamber are crucial to brewing coffee with a Keurig machine.
One punctures the outer foil, allowing hot water to fill the K-cup. The other targets the bottom of the K-cup, allowing brewed coffee to flow out.
The result is a brewed cup of delectable coffee with a consistent taste. At first glance, it may sound tedious to mimic the operation of a Keurig machine with a regular coffee maker.
Using a K-cup with a regular coffee maker is not straightforward, but it’s also not as complex as many people assume. Here’s what we mean.
How to Use a K-cup with a Regular Coffee Maker
To brew a K-cup without a Keurig machine, you’ll need to mimic the action of the needles. Start by peeling off the protective foil sealing the K-cup. Then, pour the ground coffee within the cup into a standard filter.
Voila! You’ll be able to use the contents of the K-cup with a regular coffee maker—just like conventional coffee grounds. But, you’ll have to use more coffee pod grounds. Depending on how strong you like your coffee, the odds are high that you’ll need to empty the contents of multiple K-cups into a filter.
Using K-cups with the Pour-Over Method
A regular coffee maker is the simplest method for using a K-cup without a Keurig machine. If you don’t have a traditional coffee maker within reach, the next best thing is the pour-over coffee brewing method.
Pour-over coffee is famous for its distinct taste. Using the K-cup and the filter within it, you can create a setup similar to pour-over coffee.
Here’s what you need:
- K-cup
- Scissors
- Coffee cup
- Hot water
- Milk
Start by Preparing the K-cup
Because there’s no machine to puncture the K-cup, you’ll need to peel off the foil manually. After peeling the foil, empty the coffee within the K-cup into a coffee cup.
The K-cup Filter
Position the empty K-cup upside down. Then, cut the base of the cup with scissors. You must exercise caution while cutting the base to avoid damage to the filter.
It doesn’t have to be a perfect cut. As long as the built-in coffee filter is accessible, you’re good to go.
Pour Water into the Coffee Cup
You’ll need to heat water for brewing your coffee manually. The ideal brewing temperature is just before the water starts to boil. At this temperature, stop the heat and allow for a 40-second cooling time.
Pour the hot water into the coffee cup holding the coffee grounds. Instead of dousing the coffee with water in one go, you want to go slow. Afterward, let the coffee mixture sit for about four minutes.
Filter out the Coffee
This step is where the cut-out end of your K-cup and the filter within it become useful. You’ll need this cut-out container and an empty coffee cup to complete this step.
Place the cut-out cup above the empty coffee cup. Then, pour the mixture through the K-cup cut-out.
While pouring the mixture, you should go as slow as possible to avoid overflowing the K-cup. Remember, the mixture will have to pass through a filter.
The pouring step is time-intensive. While going slow, you also have to focus on preventing a mess.
The time it takes and the possibility of a mess are the drawbacks of the pour-over method. At best, pouring the mixture through the K-cup cut-out is inconvenient. At worst, you may end up creating a mess that’ll take forever to clean.
Enjoy Your Cup of Joe
After filtering the last of the mixture in the cup through the K-cup, it’s time to enjoy your hard work. Depending on how you like your coffee, you can add milk, sugar, creamer, and other additives.
Open a K-cup and Use a Coffee Bag
The method above is time-intensive and requires plenty of attention to detail. If you don’t have the time to go through that, you can use an alternative approach.
This method of brewing a K-cup without a Keurig machine involves using a paper filter. Here’s what you need for the process:
- K-cup
- Paper Filter
- Scissors
- Hot water
- String
- Coffee cups
- String
The string should not have any plastic on it. Plastic can melt after coming in contact with hot water.
Empty the Contents of the K-cup
Just like above, you’ll need to remove the foil and empty the coffee grounds within the K-cup. You don’t have to keep the empty K-cup—its work is over.
Prepare a Filter
Start by spreading the filter flat on a level surface. Then, pour the coffee grounds on this filter.
You’ll want to pack the coffee grounds securely within the filter. To achieve that, you’ll need to tie the paper filter with a string. Make the string long enough to work as a harness for dipping the coffee sack into the water.
If you don’t have a filter, another hack is to try a teabag. Gently tear the bag on one end and pour its contents into a mug (you can keep the contents for later).
With the tea bag empty, you can pour the coffee grounds into it and tie it with a string. It’s a faster way to get a “coffee teabag” with less effort on your part.
Ready Your Water
Hot water is a crucial component for brewing coffee. Just like before, you’ll need to heat water for the brewing process.
You’ll need to do some minor calculations here. Too much water can make your final brew watery. Therefore, try to balance the quantity of water to how much coffee ground is in the “coffee bag.”
Another factor is the right temperature for brewing your “coffee bag.” Again, you’ll have to heat the water until it’s just about to boil. Then, wait for it to cool for about 40 seconds.
Brewing the Cup of Coffee
Start by pouring the hot water into a coffee mug. Then, place your “coffee bag” into the mug and wait a bit of time for nature to take its course.
You should allow the mixture to remain undisturbed for about three to five minutes for the best results. If you prefer a strong brew, leave the bag in a cup of hot water for up to ten minutes.
A helpful hack is to press the “coffee bag” firmly with a spoon before removing it. This simple hack will remove any absorbed water nestling inside the coffee filter. If you like your coffee strong, it’s an extra touch that can make a world of difference.
Enjoy Your Coffee
You have done all of the hard work. All that’s left is to add chocolate milk, sugar, or any other additives you usually use. Don’t forget to throw away the “coffee bag” before enjoying your cup of coffee.
Before You Go
K-cups are a type of single-serve coffee. With a working Keurig machine, you can brew a single cup of coffee from a K-cup. All you would have to do is push a button.
If you don’t have a working Keurig machine, you also use a K-cup with an ordinary coffee maker. It will take some manipulation, but the process (as described above) is simple enough.
If there’s no working coffee machine, you can try the pour-out method above or use a DIY coffee bag to brew a steaming cup of amazing coffee.
Happy Caffeinating!